Natural Dye with Alder Cones
- Emma June Designs

- May 4, 2025
- 2 min read

Alder cones are great to harvest in Autumn and Winter when there aren't as many other dye plants available. However, it's May at the moment and I can still see a lot on the ground so it's not too late if you want to try dyeing with them! These little cones are high in tannins which produce a lovely warm caramel colour.
My dye process is not very specific, I prefer to work intuitively with the plant and allow the colour to show itself in an organic way. Natural dyeing gives you a chance to slow down and connect with nature on a deeper level. From foraging for your plant to watching it's colours extracting and changing. Many factors can alter the dye results such as the pH of the water, the age of the plant, the mordant used (if any) and even the pot you used for the dye bath.


First, I washed the alder cones then soaked them in a jar for around 3 days. They only really need to be soaked over night but life with two young children leaves little time! Make sure you don't use too much water, you want the dye to be as concentrated as possible.
I then added the mixture to an aluminium pot and heated it up. Be careful not to boil the dye. I gently simmered the liquid for around 30 minutes then let it cool overnight. If you want your material to be be evenly dyed then you could strain out the alder cones. I don't mind differing shades so I left them in.

To get the most vibrant colour it is best clean your fabric thoroughly and then treat it with a mordant. I used alum (aluminium sulphate). Around 10 - 20% of alum to dry fibre is a good ratio, so if you had 100g fabric then you should use 10 - 20g alum. Alum is non toxic however is may still irritate your skin so it's best to wear gloves when using it.
Mordant process:
Fill a pot with enough water to allow your fabric to move around freely.
Add alum and gently heat up the water. Stir until it dissolves.
Add your fabric to the pot. Gently stir and let the mixture simmer for 15 minutes. I normally leave my fabric in the pot to cool overnight but it can be removed after 1 hour.
Your fabric is now ready to dye with! It can be added straight into the dye bath or you can let it dry and store it away to use at a later date. Just be sure to wet your fabric before adding to the dye bath to allow the colour to distribute evenly.


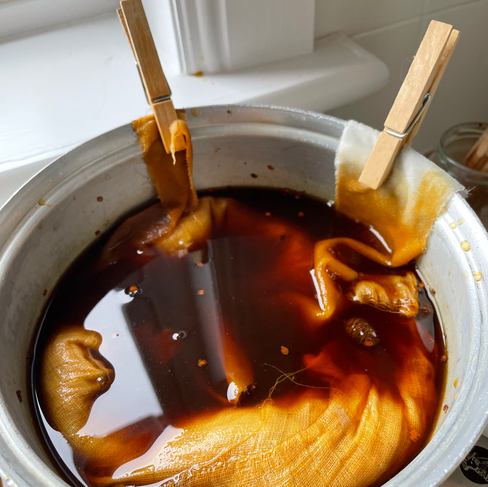


This was my first tester after 24 hours:

I was keen to try get a richer colour so I left my fabric soaking for 48 hours.
Here are the results:


Natural dyeing always surprises you. The pins I used to fold the fabric reacted with the alder cones creating a blue/black mark. I think it looks a bit like leopard or tiger print!
Let me know if you try out dyeing with alder cones, I'd love to see your results!


Comments